
The purpose of SpecifiedBy is to help specifiers find your products and all the supporting information about them, quickly and easily. So we need to create your product pages using our simple Content Management System (CMS).
Products are added from the 'Manage Products' section of your dashboard, which you will be directed to whenever you log into SpecifiedBy (https://www.specifiedby.com/dashboard/products).
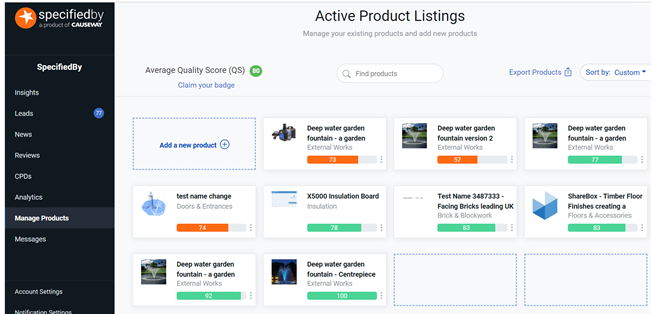
From here you will be able to view all of your active product listings, add new products, edit existing products, and see your 'Quality Score' for each product (more on quality score here).
To start the process of adding a product, click the 'Add a new product +' link at the top left of your active product listings grid:

Adding a product is broken down into 3 steps, which can be navigated along the bottom of the page of the add a product process:
- Add general product information
- Add your product specification properties
- Upload product files for download

Step 1 - General Information
Step 1 is adding the very basic information about your product:
- Product Name
- Images
- Description
- Category
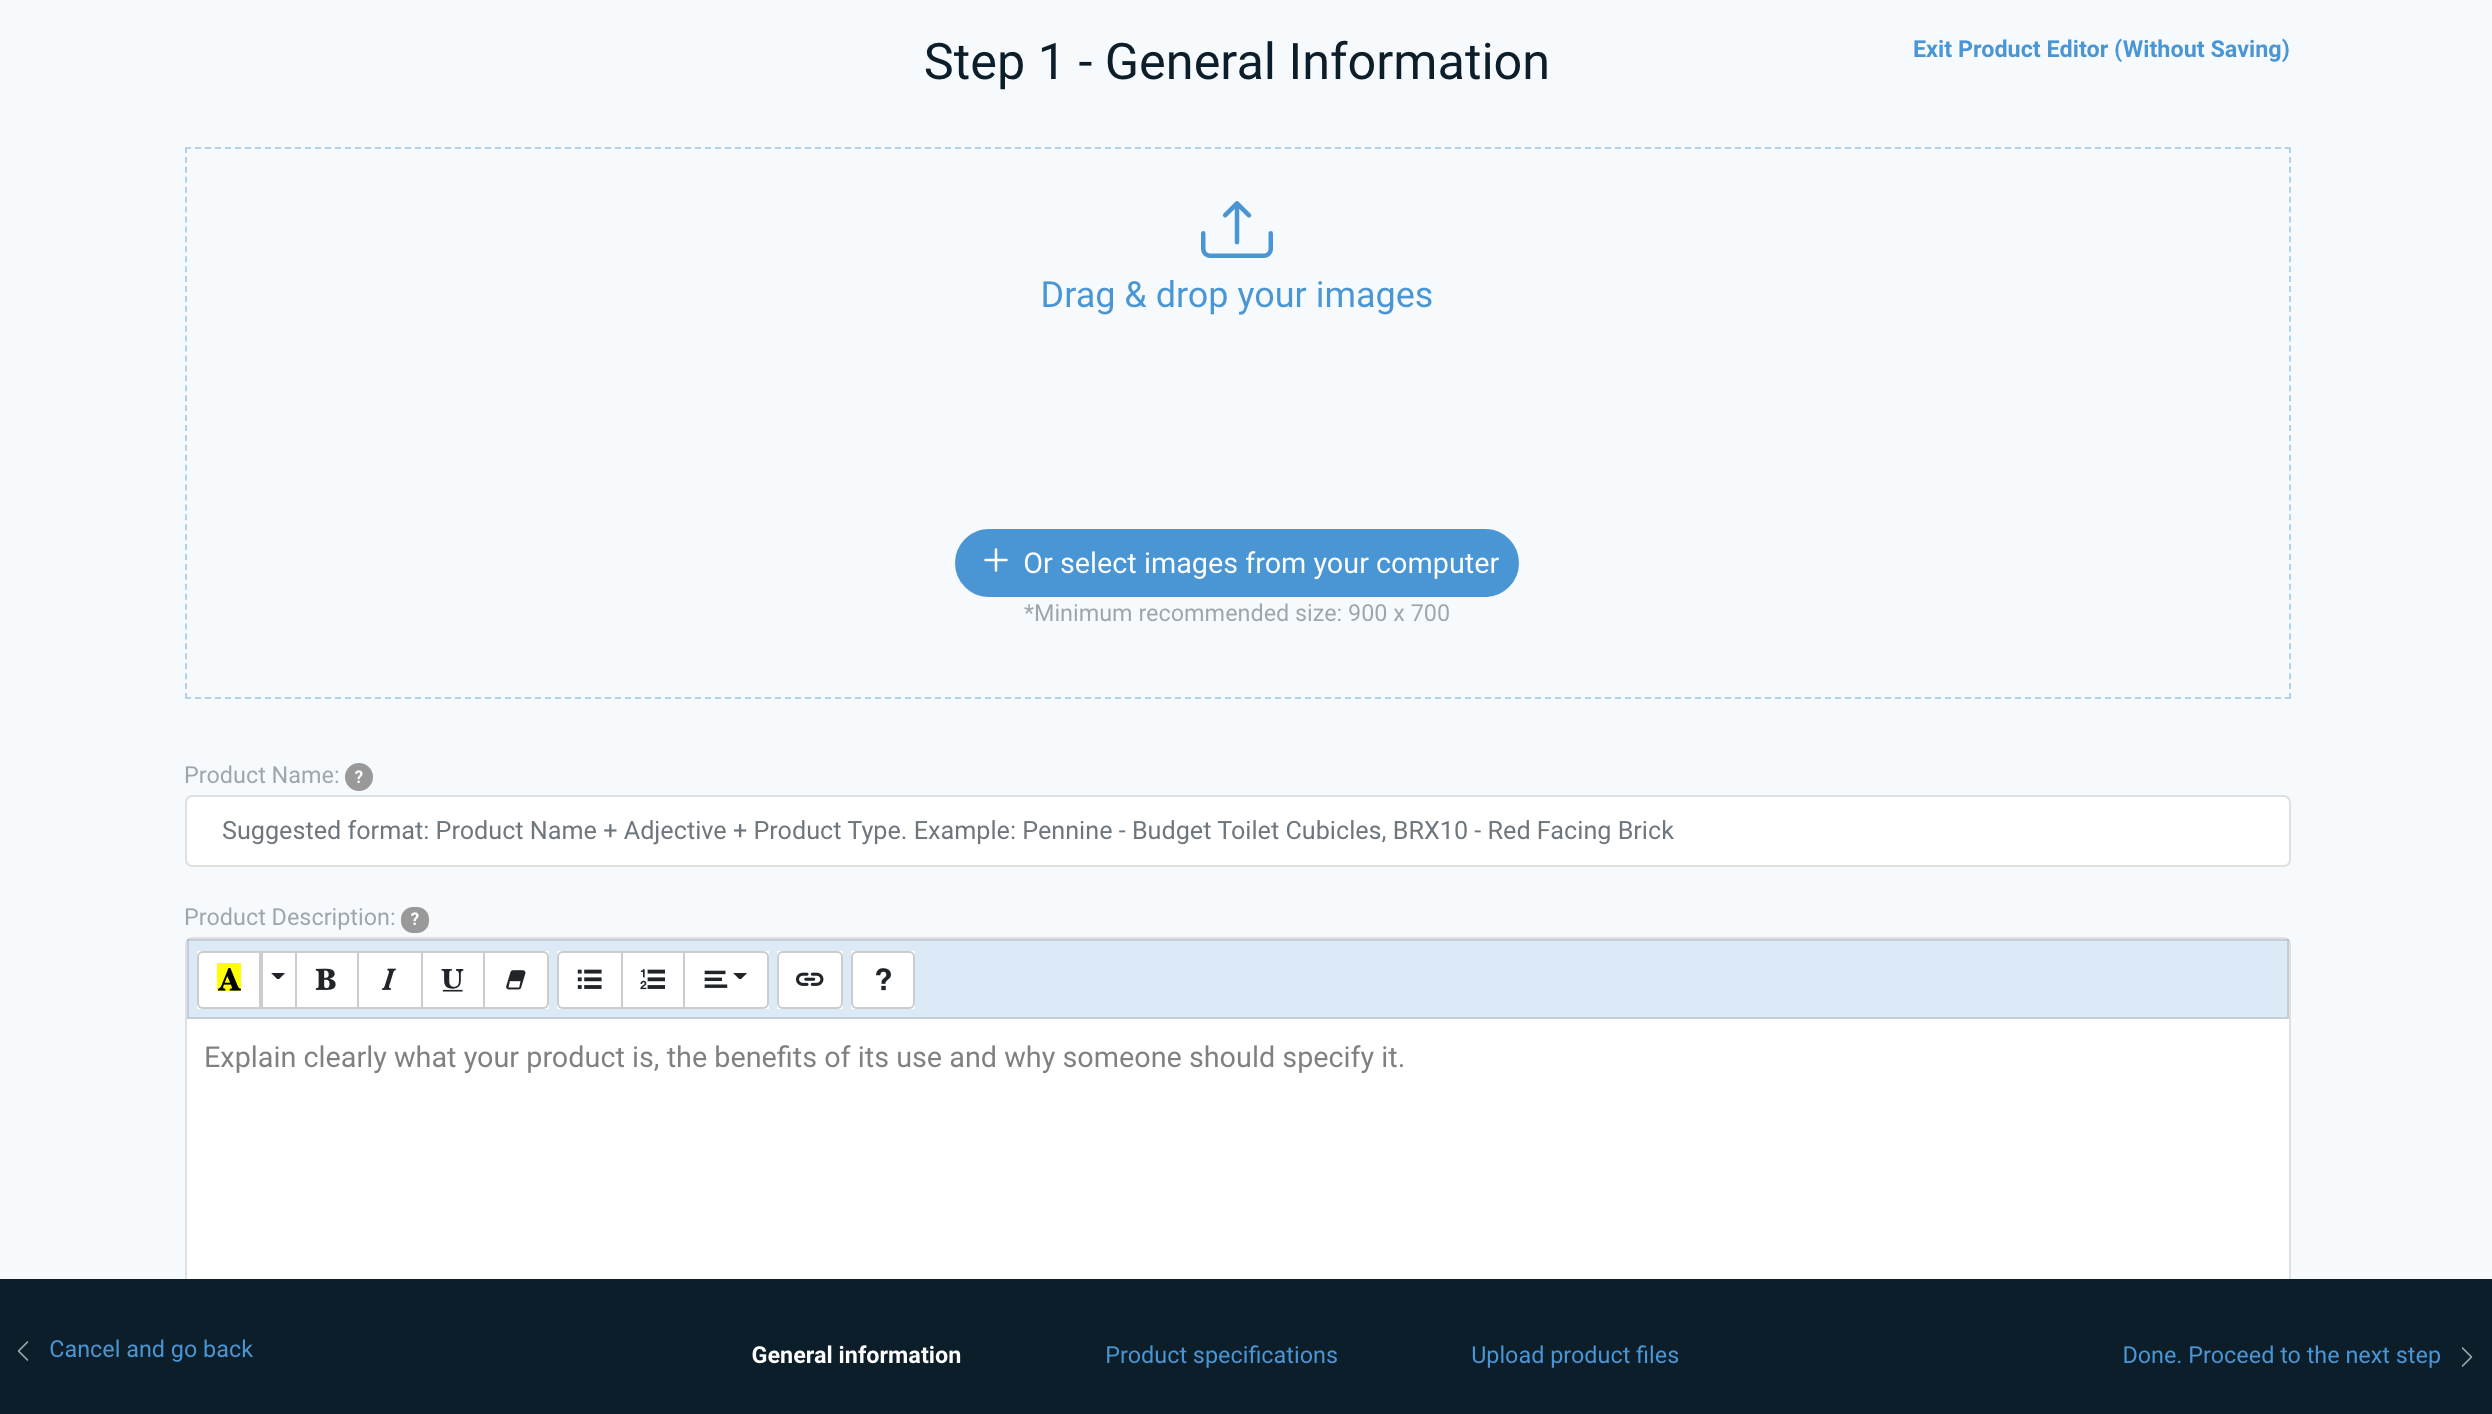
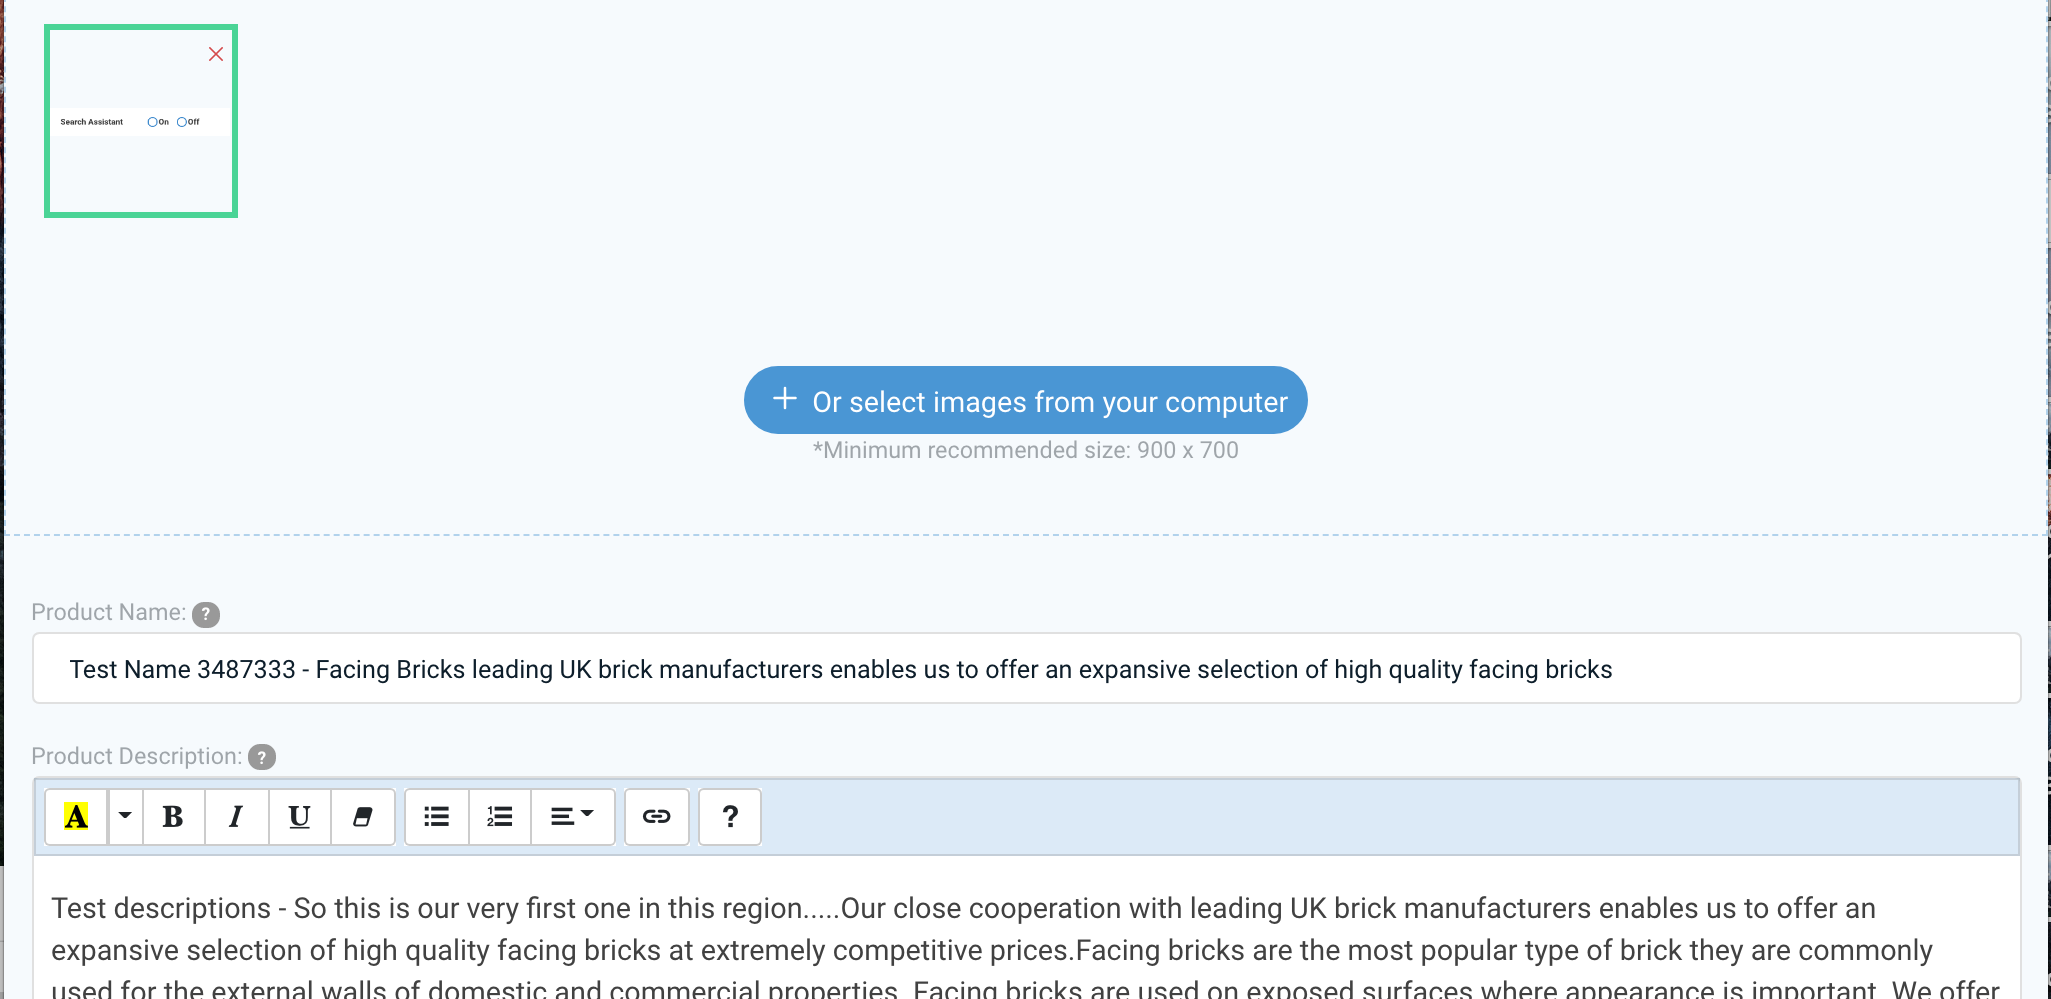
Images can be simply dragged and dropped (individually or multiple at a time). Once you have added all of your images, simply select the thumbnail (the image that will be displayed in search results etc.) by clicking on the relevant image.
The thumbnail is marked with a green border:
When you add your product name and description, our system will suggest where your product should be categorised (based on on the other products in our database and some machine learning).
This can be accepted or rejected. Either way, it is possible to manually select categories.
Our categorisation has 3 levels and is based on simple terms that specifiers use to search rather than any complicated classification system:
Level 1 - Category > Level 2 - Sub-category > Level 3 - Type
For example:
Ceilings > Ceiling Panels & Tiles > Acoustic Ceiling Panels & Tiles
If you cannot find a category to suit, use the closest fit you can and email us on [email protected] - we can add new categories as required.
Once you have added all of this information, click on the 'Done. Proceed to the next step' link in the bottom right of the page.
Step 2 - Product Specifications
This is one of the main differences between SpecifiedBy and more traditional 'product directories' - we are creating a database of structured product information which provides searchable, queryable products.
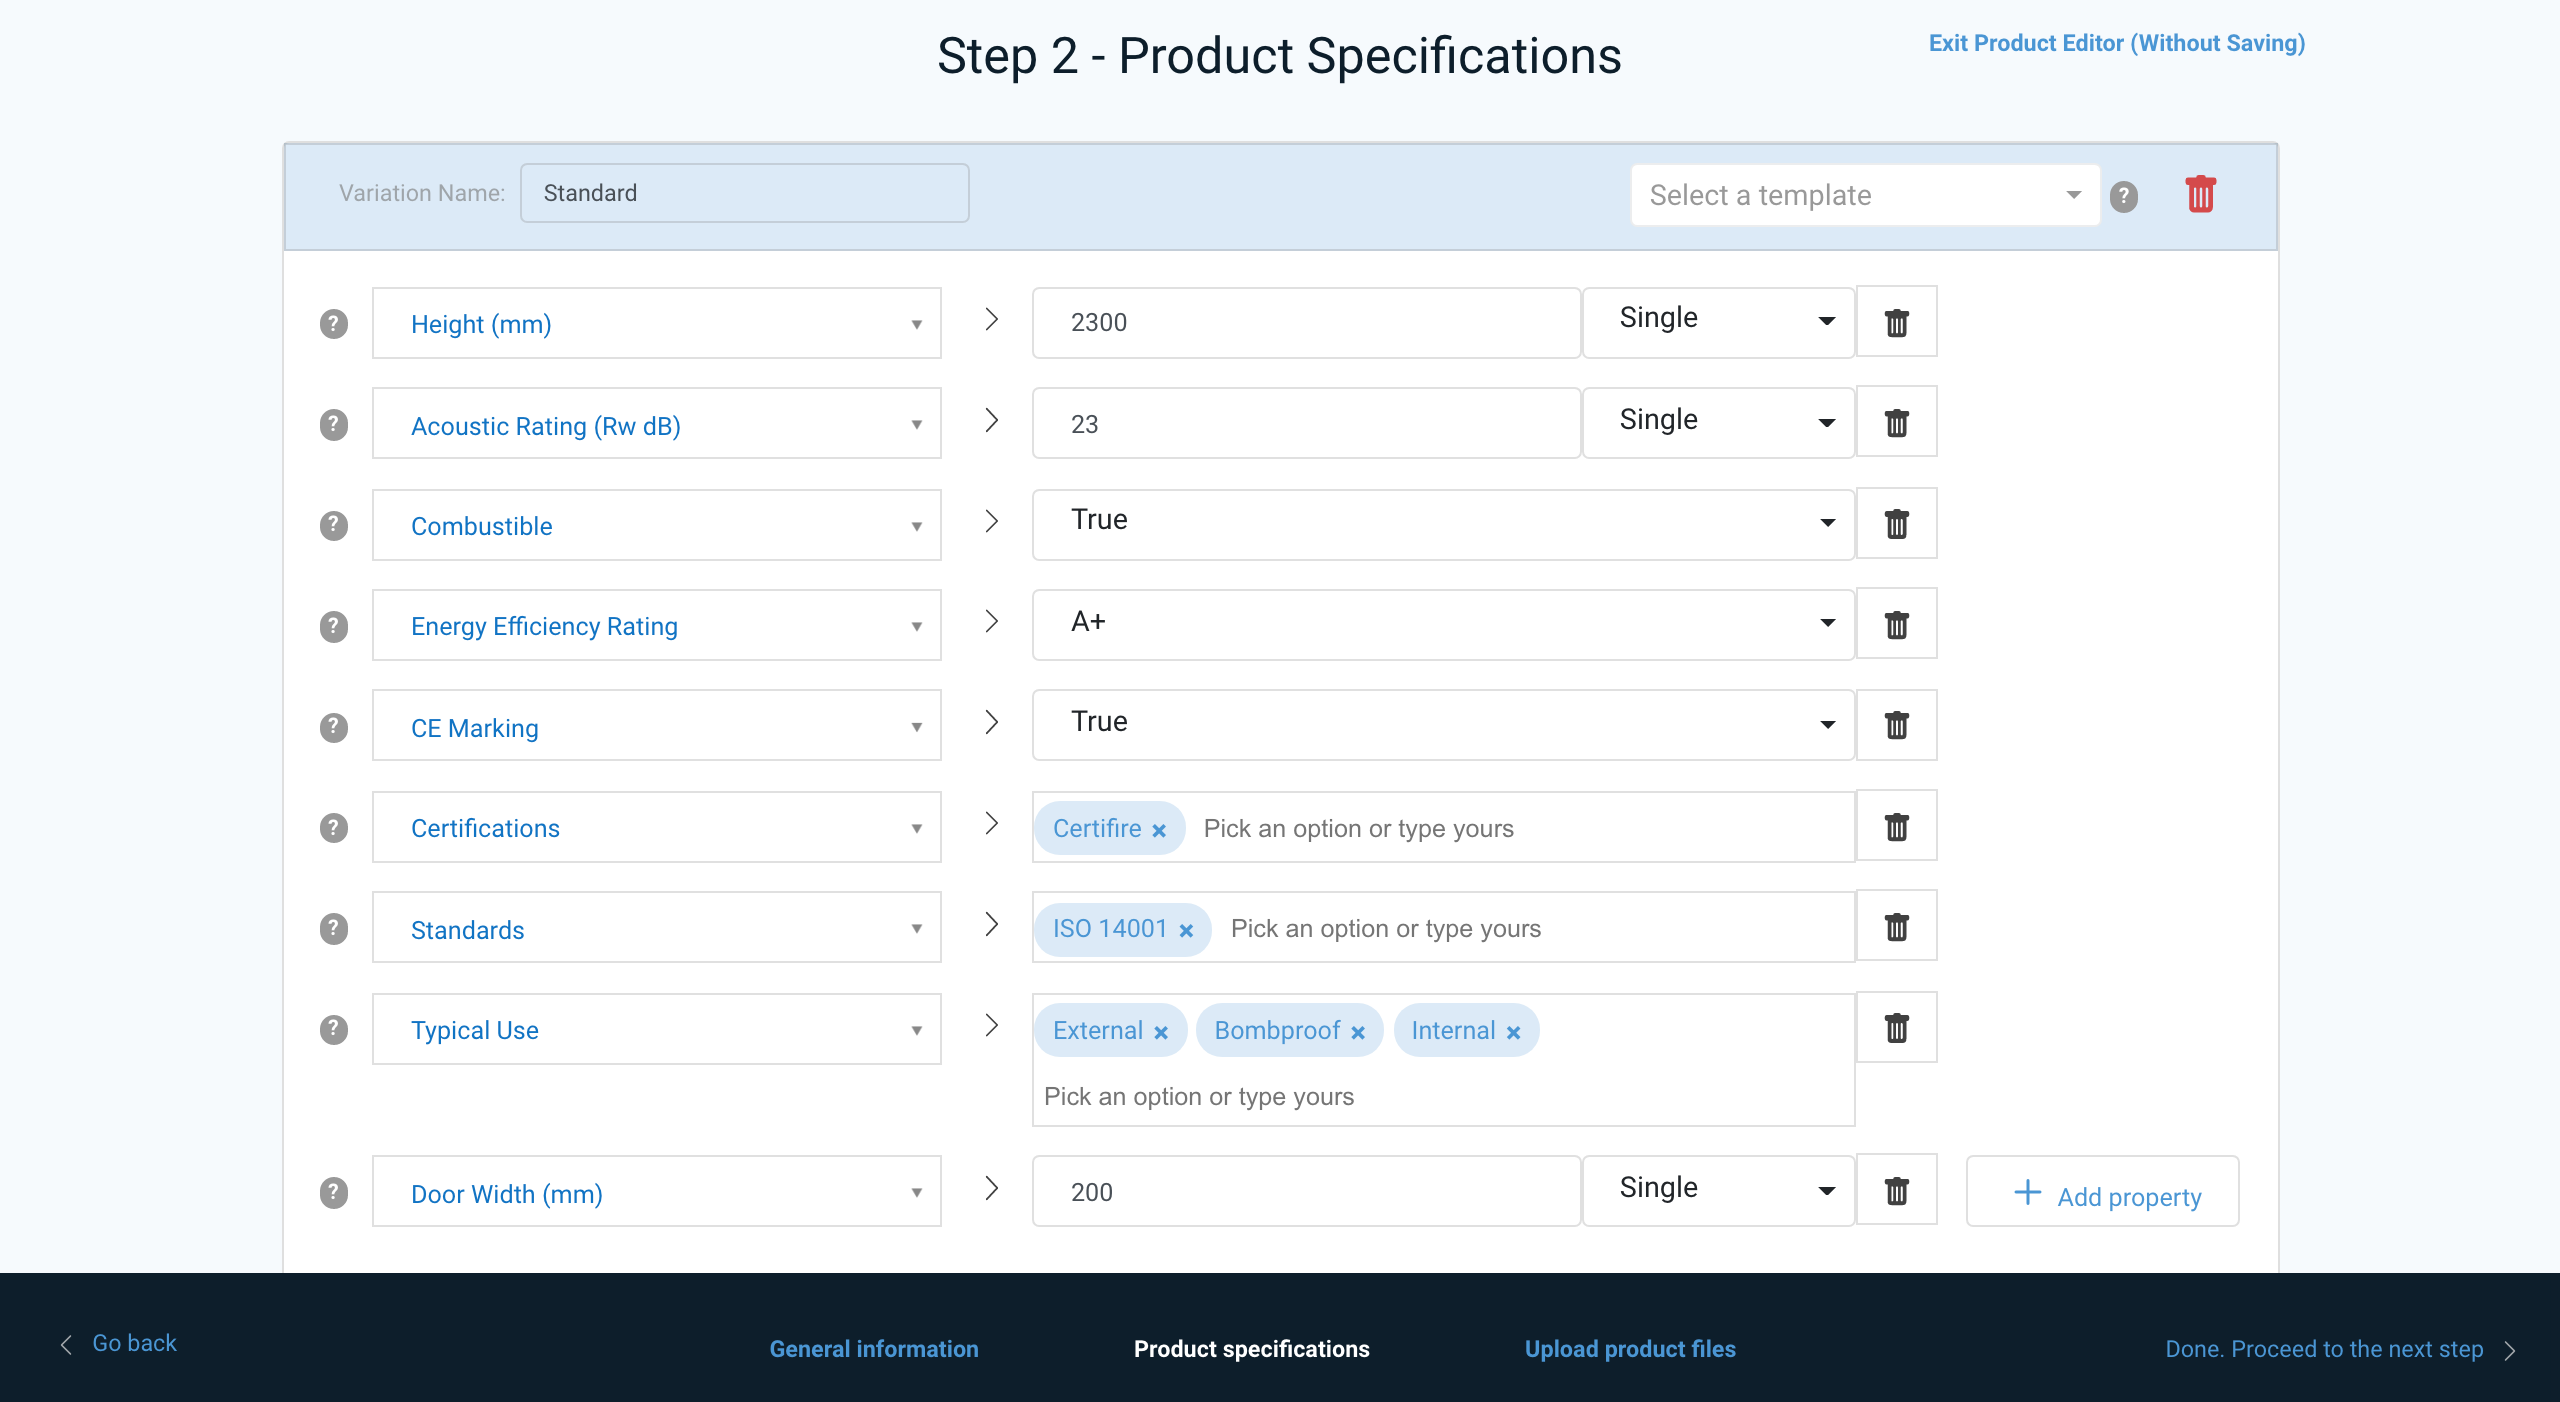
By providing specification properties for your products, they become compatible with our advanced search and product comparison features.
The information required here is simply the sort of information you would and perhaps already provide in the form of a technical datasheet.
When you first land on this page, SpecifiedBy will provide a suggested properties to complete, based on your product category.
If you've added other products already, you can also select one of them to use as your template:
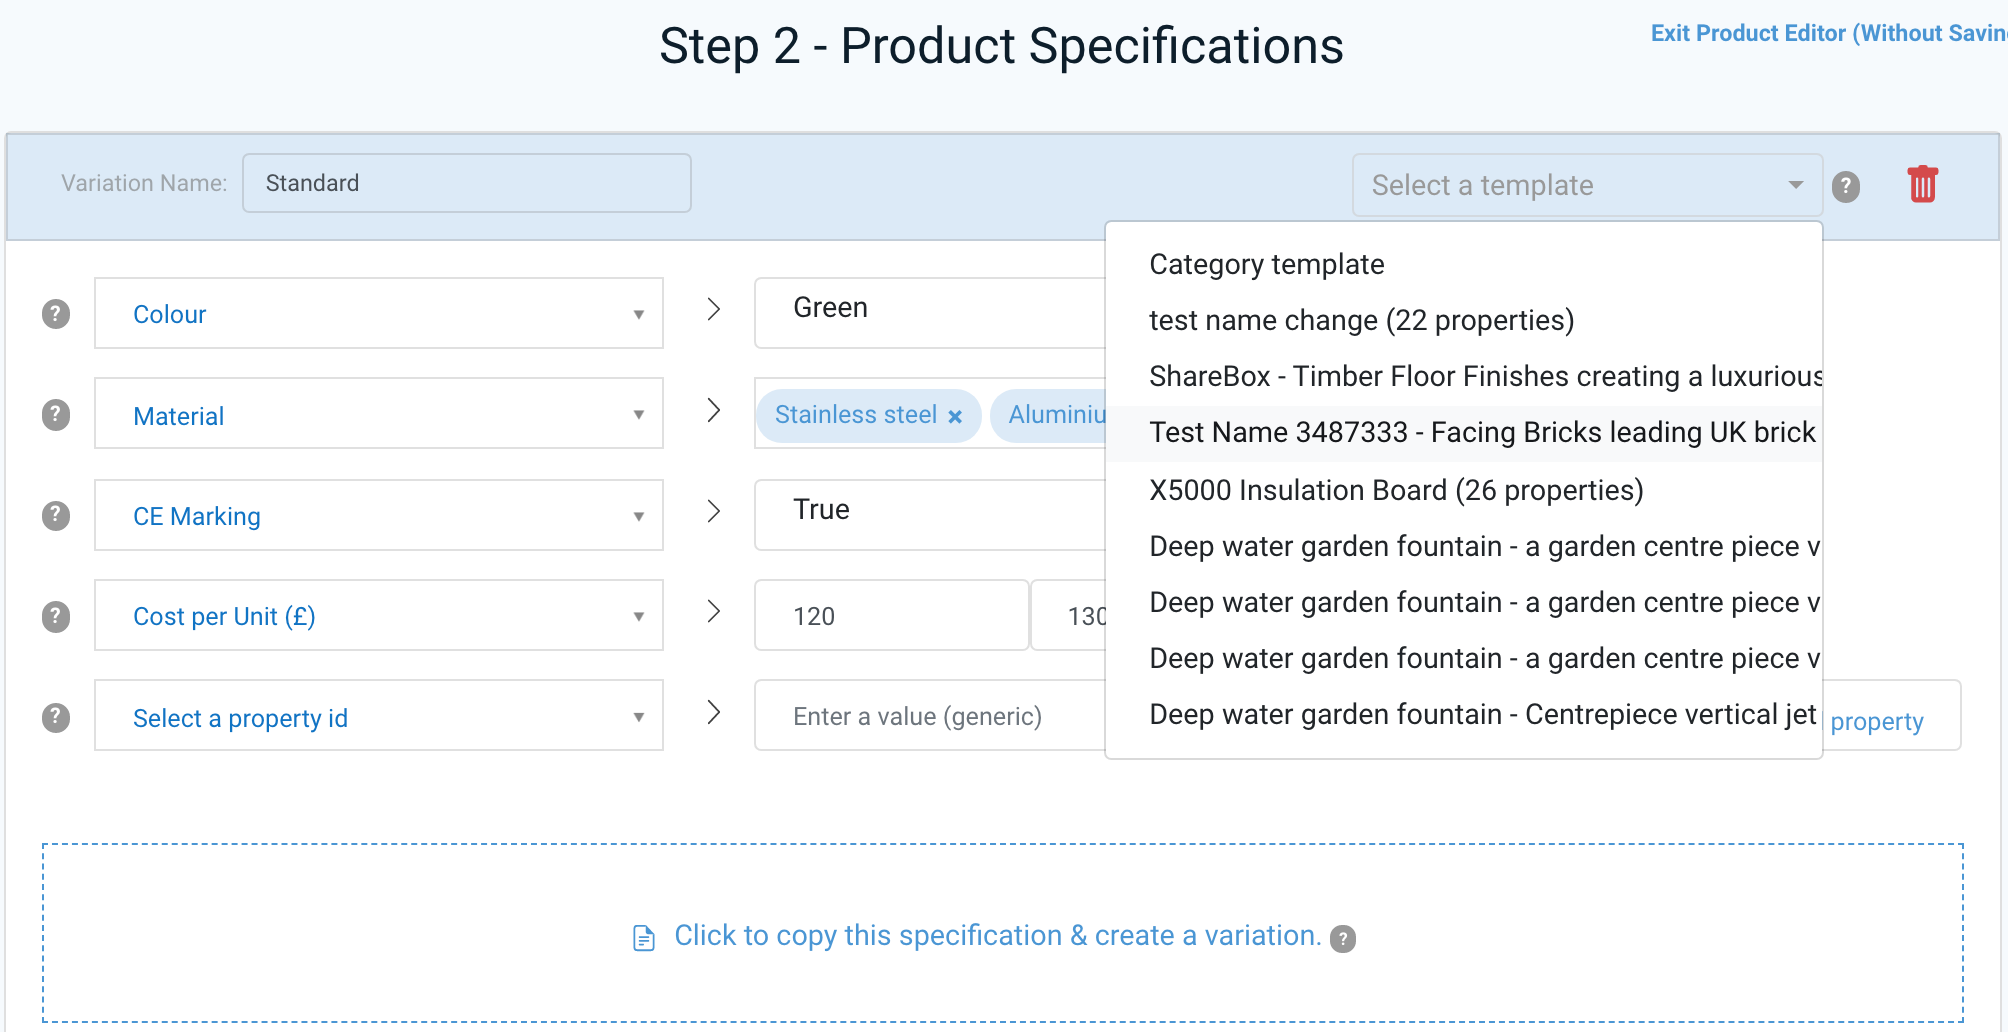
Selecting Properties
There are over 400 properties to select from on SpecifiedBy, which should cover your needs. You can select these from the dropdown list or search for your required term. Properties are grouped together as follows:
- Certifications & Ratings
- Commercial
- Materials & Finishes
- Physical Properties
- Size & Weight
- Sustainability
- Technical
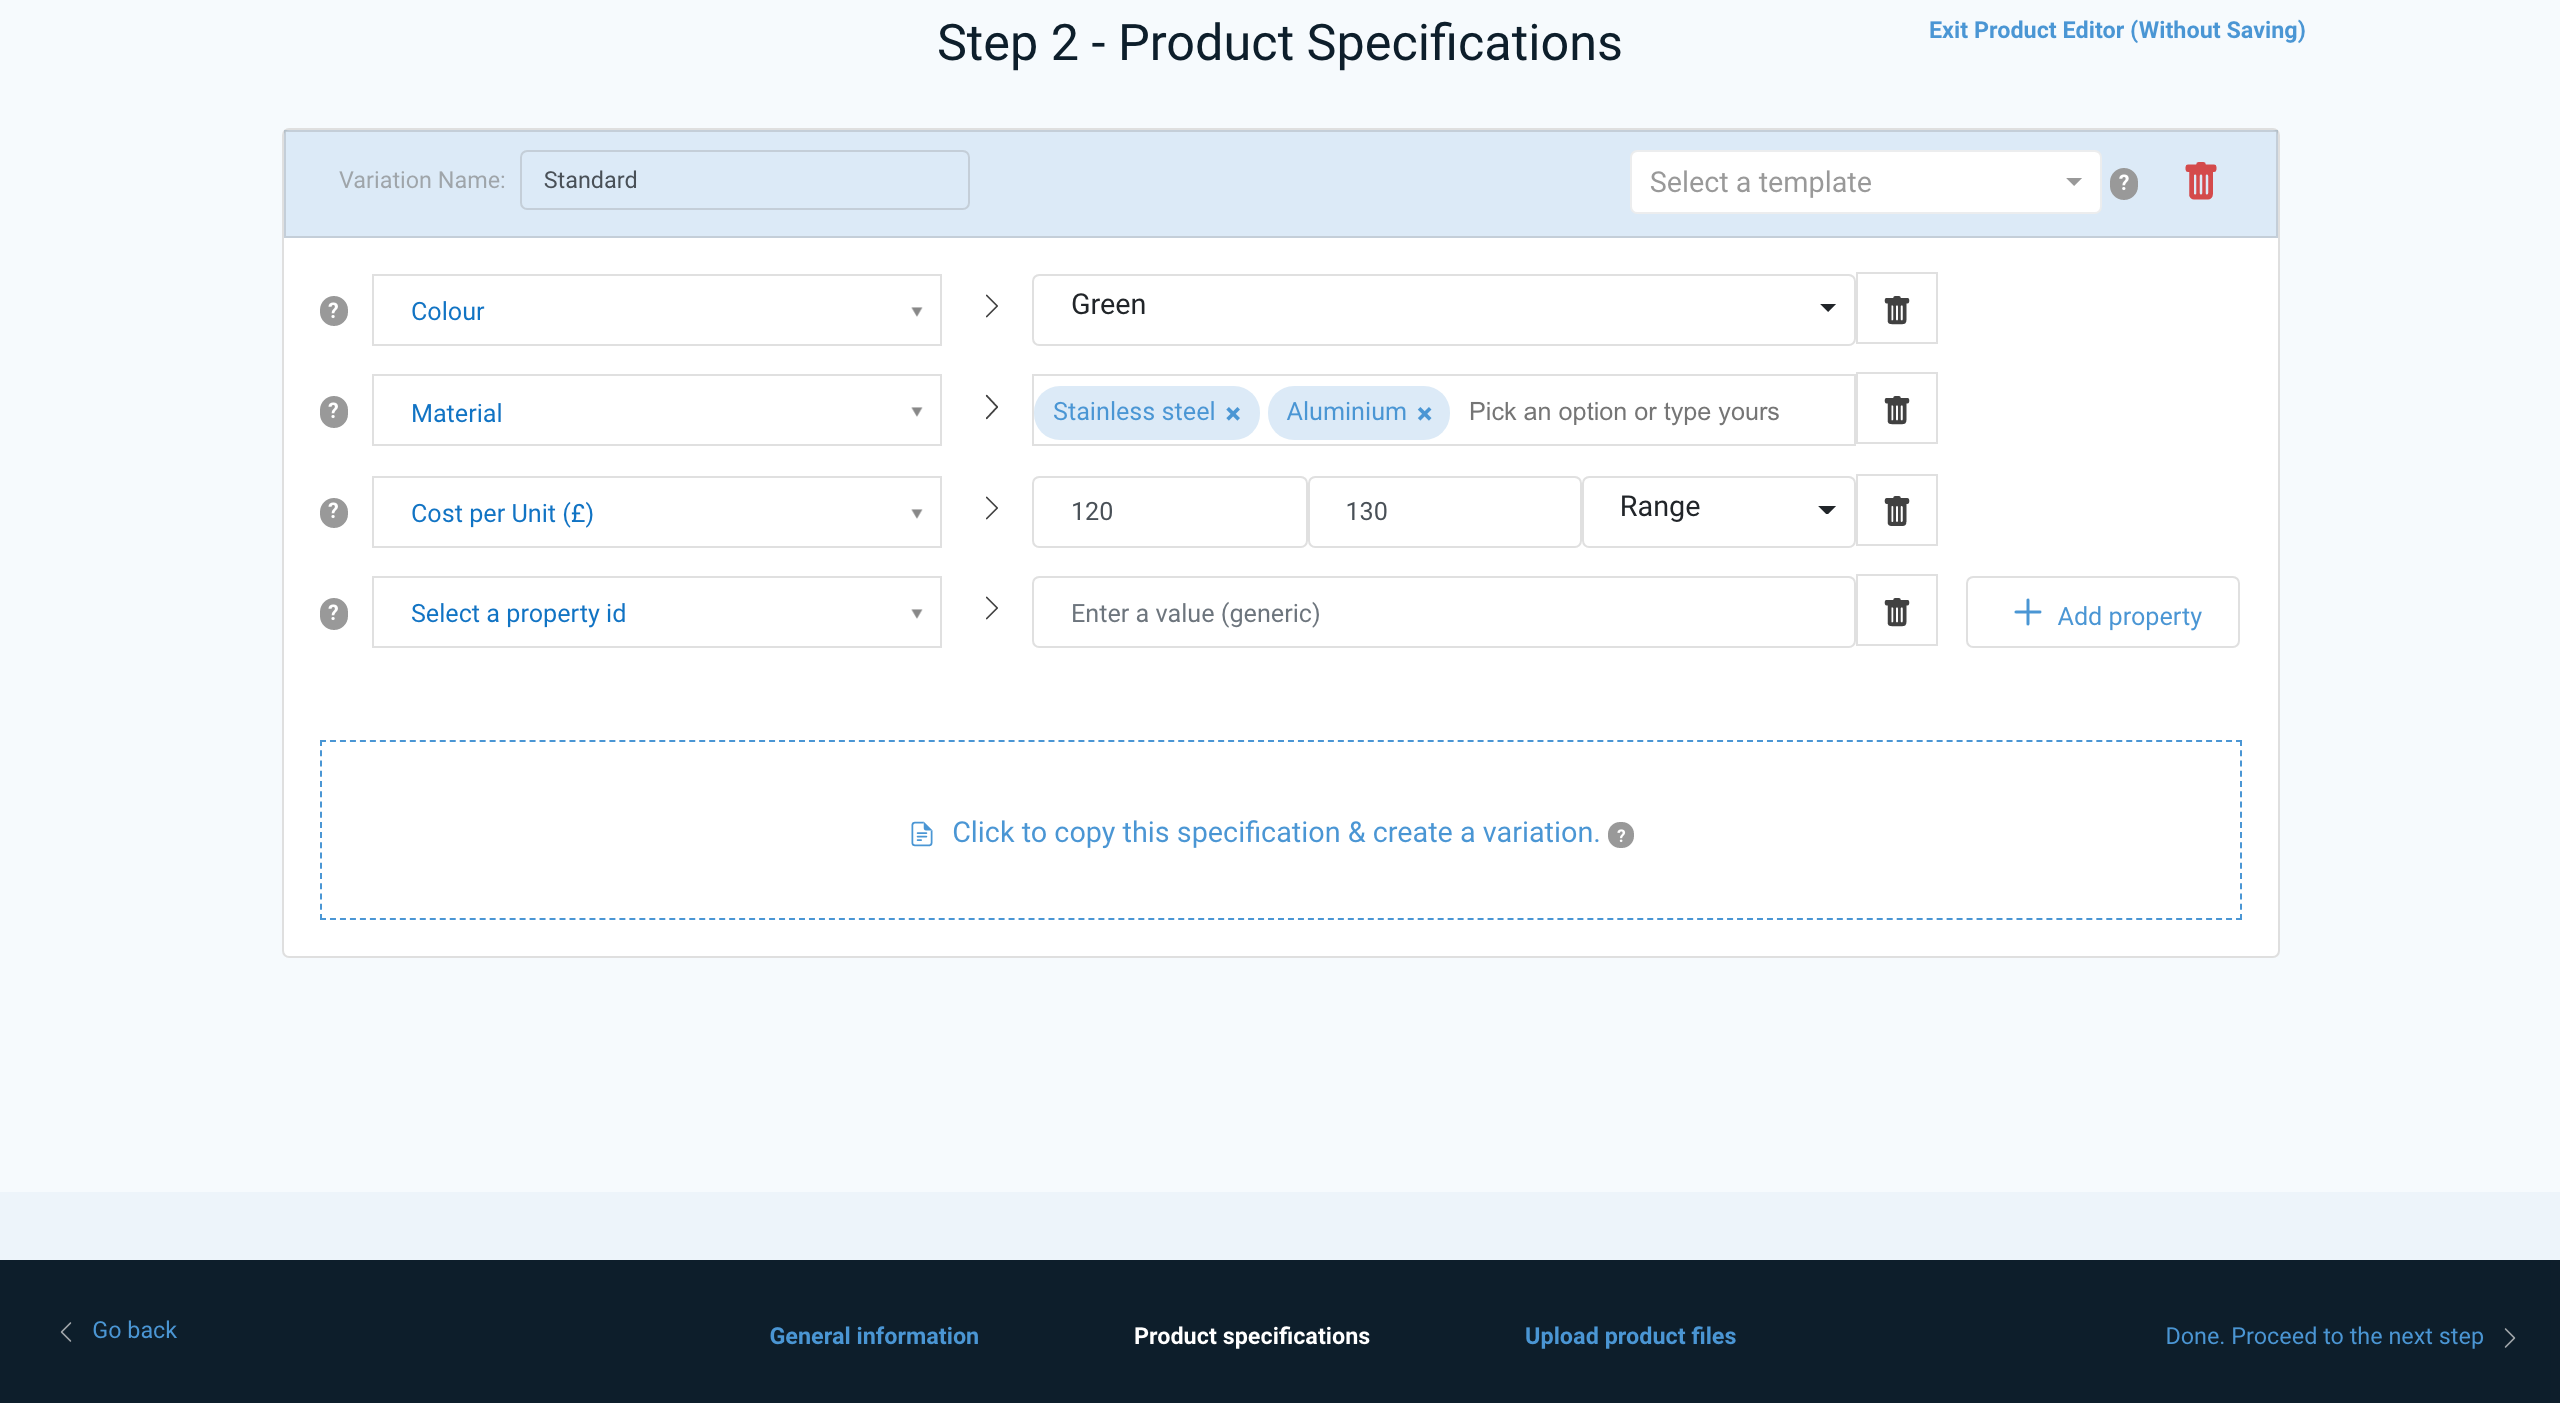
Each property has units and rules associated with it - eg. Length is measured in mm and requires you to enter a single number.
Once you have added a property, press the 'Add Property' button to add another. Repeat this process for as many properties as you wish to add. Any property can be deleted with the 'bin' icon.
Once you build up a property set, you end up with something that looks like this:
Variations
We're aware that some products come with different options and variations, so you may add different versions, with different properties for the same product.
On SpecifiedBy we call these 'Variations'.
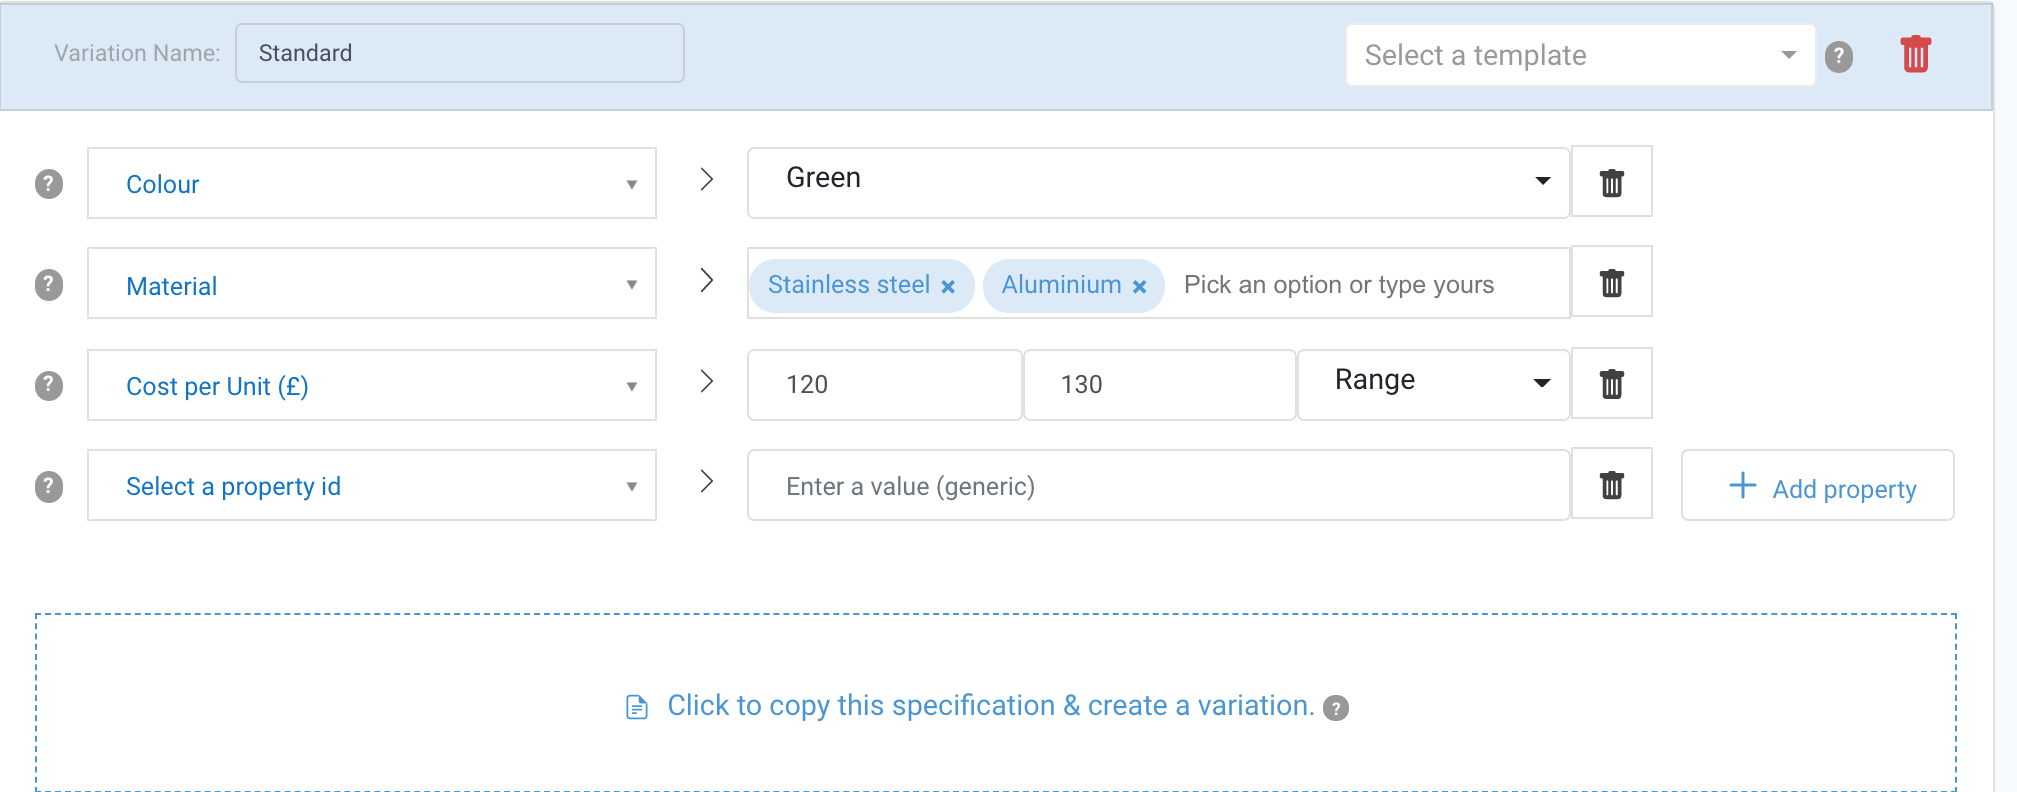
You may have noticed at the top of the Product Specifications section there is a box which contains the word 'Standard' (image above) - this is the name of each product variation and can actually be edited to suit.
Standard is the default for the first set of properties, and there is no need to change this (as it will not display) if there isn't any variations of the product.
You can name variations as you wish, but we recommend using something descriptive, related to the variation.
To create a new variation you simply press the big blue 'Add Variation +' button below your specification properties. Creating a variation will create a replica of all the properties you added to the standard version, saving you the time it takes to add them all again. But you can add or remove properties specific to each variation.
Pricing
You have the option to add pricing to your products on SpecifiedBy. This is a sensitive area for most companies, but can have a hugely positive impact on conversions.
We handle this in a clever way that ensures you capture leads / enquiries without having to deal with the back and forth of providing quotes.
For full details, see our guidance on pricing here.
Step 3 - Adding Product Files
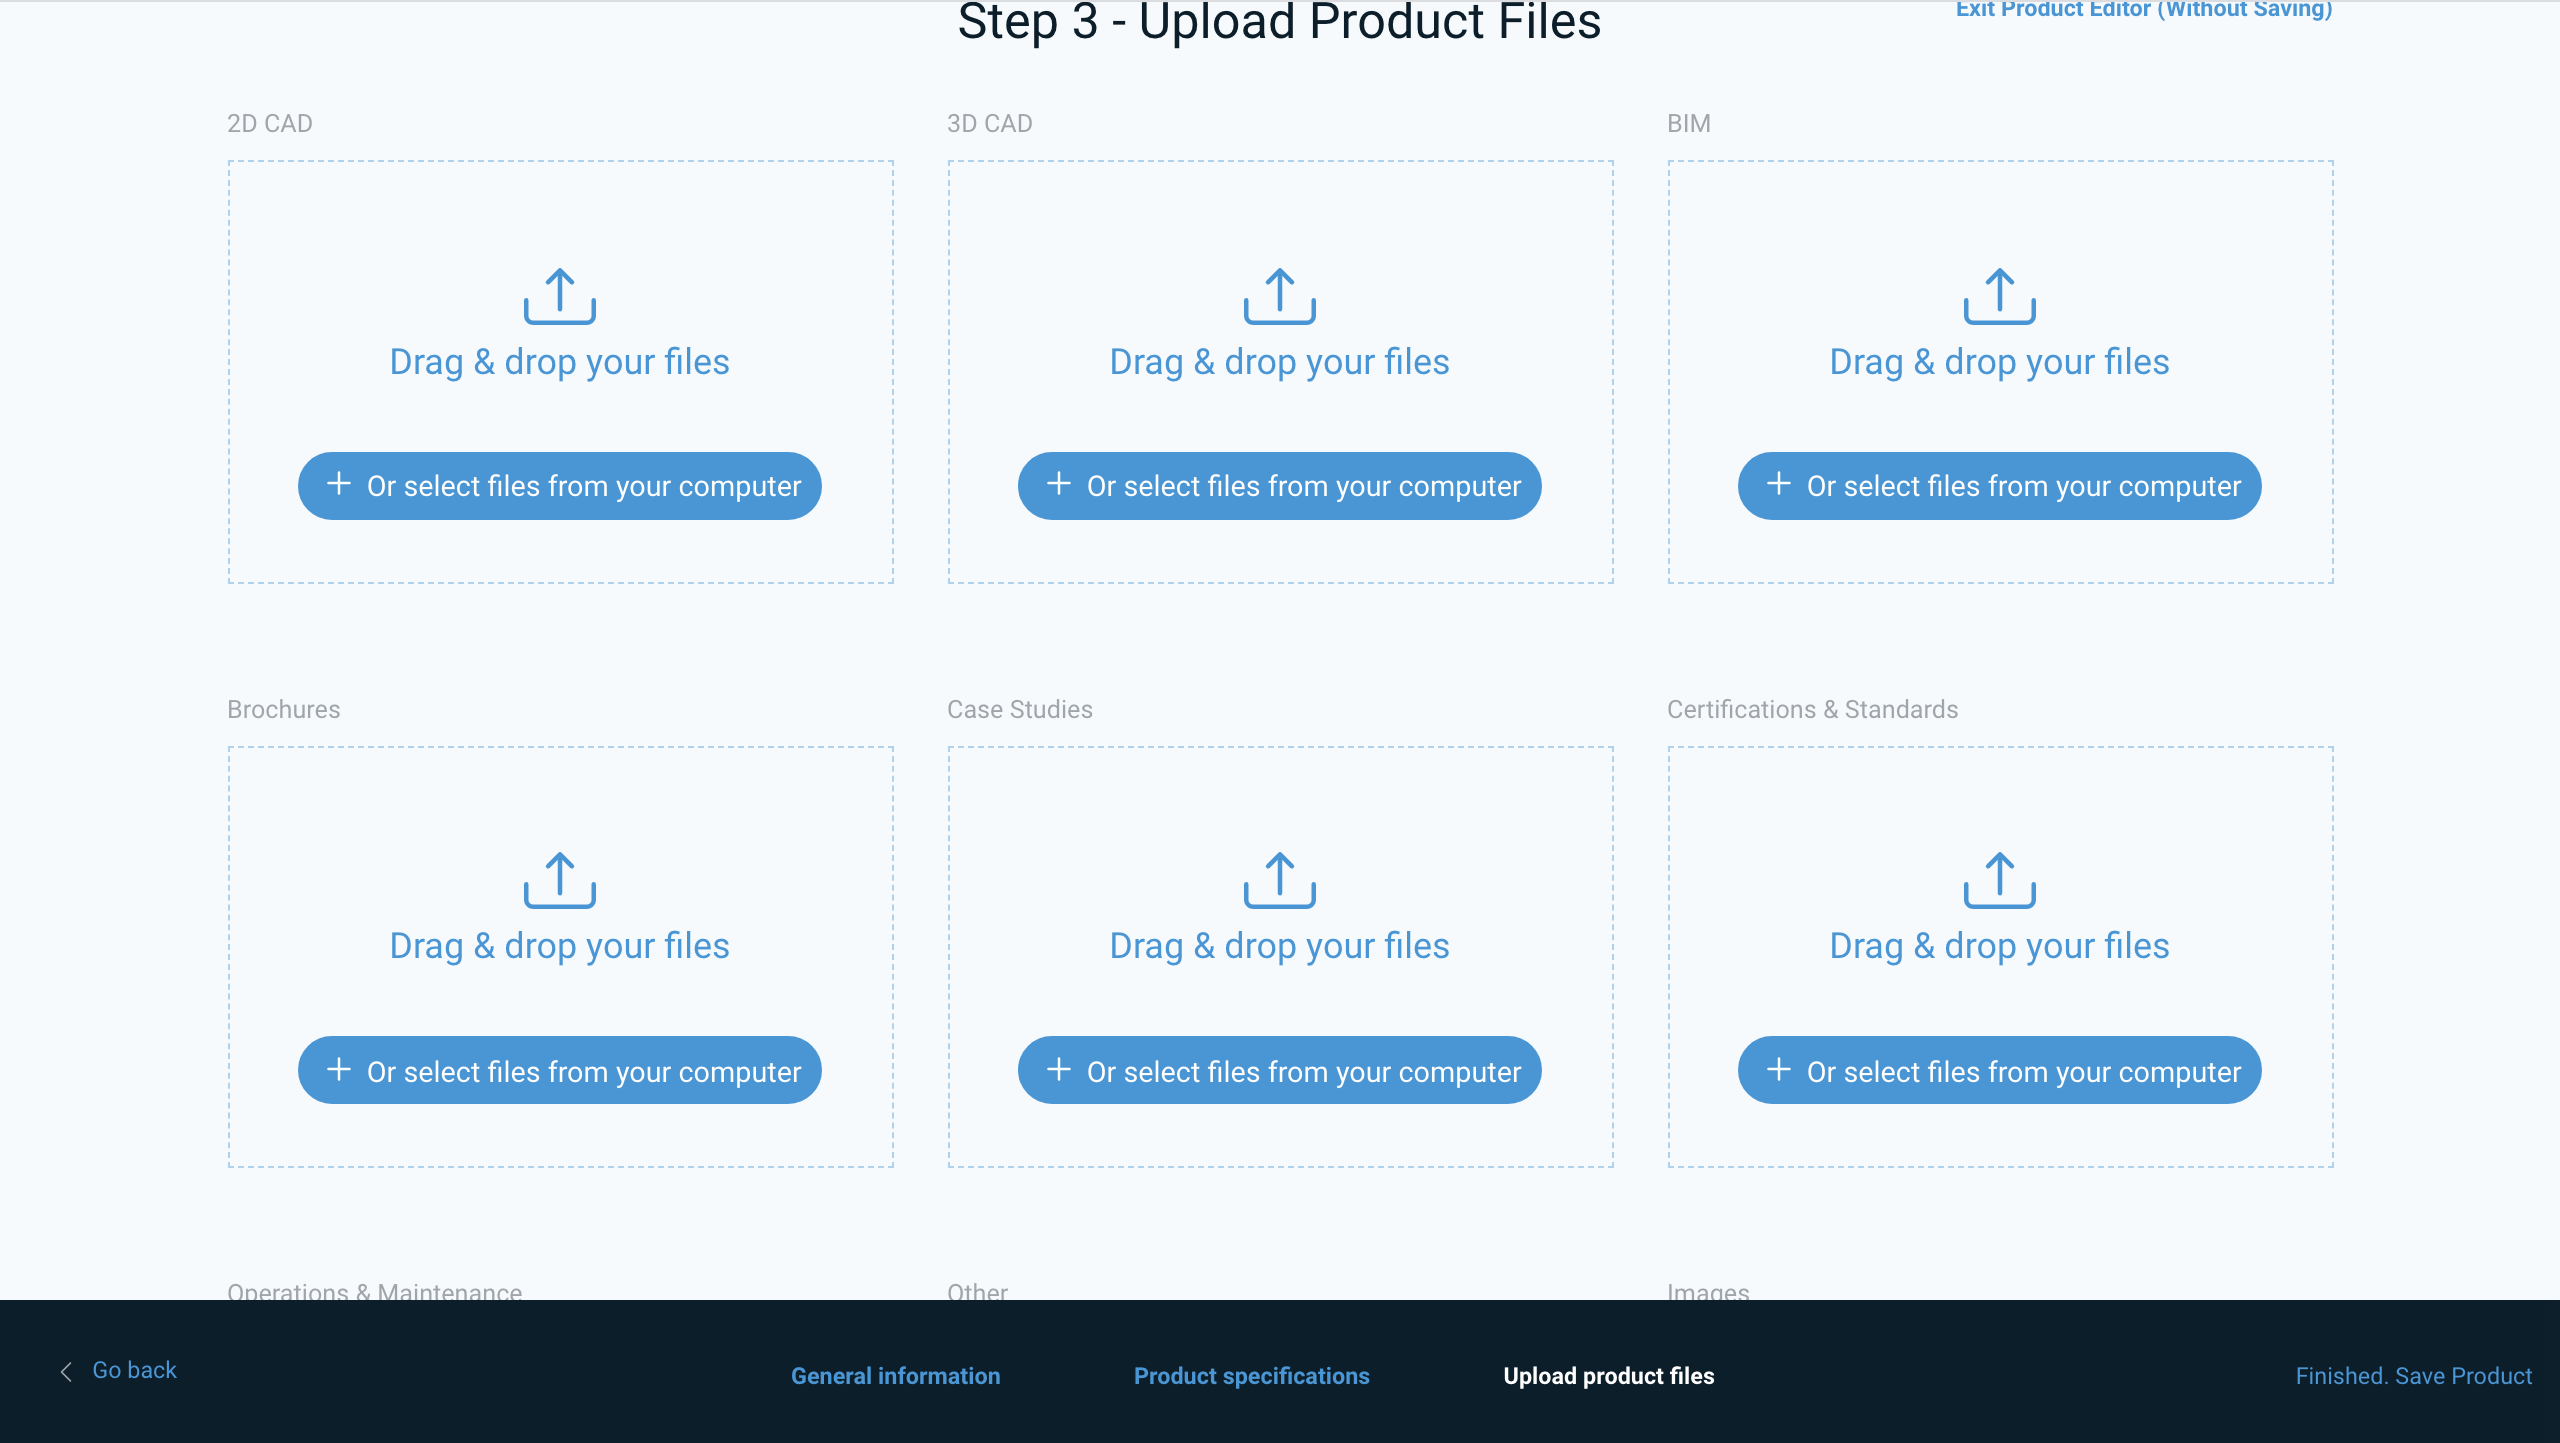
The final part of the product page is downloadable files. Here you can upload as many files as you wish to support your product listing. File are categorised as follows:
- 2D CAD
- 3D CAD
- BIM Objects
- Brochures
- Case Studies
- Certifications & Standards
- Operations & Maintenance
- Other
- Images
- Specifications
- Technical Files
To upload files, simply select the relevant file tab, press the '+Add Files' button to find the file(s) on your computer and then press start upload. You can upload multiple files at once but the more you upload an the bigger the files, the slower the process may be
When you upload more than one image, you have the option to select which one is the 'thumbnail' for that product ie. the front cover.
Finish
Once you have added all the information and files necessary, press the 'Confirm' button.
Editing a Product
All products you create can be found in the products section of your dashboard ( https://www.specifiedby.com/dashboard/products).
There is an 'Edit' button on each product 'card' which will bring you into the same form as before when first creating a product.